Monday 9 January 2017

Engine & Driveability Problems: 14 Engine Hesitates or Stumbles When Accelerating:

throttle hesitation

Problem: Engine Hesitation

Hesitation is when your engine misfires, stumbles or lacks power when you accelerate or step on the throttle. The problem often means the air/fuel mixture is not being properly enriched or is going lean, or the ignition system is weak and is misfiring when the engine comes under load or the air/fuel mixture goes lean.
When you step down on the accelerator and the throttle opens, the engine sucks in more air. The computer should respond by adding more fuel.

If the engine has a speed-density type of fuel injection system (no airflow sensor), the computer uses inputs from the throttle position sensor, manifold absolute pressure sensor, air temperature sensor and engine rpm to estimate airflow and how much fuel the engine needs. 
NOTE: Speed-density systems are much less sensitive to vacuum leaks than EFI systems that use an airflow sensor.
If the engine has an airflow sensor (vane airflow or mass airflow), it looks primarily at the airflow signal from the airflow sensor, but also takes into account what the throttle position sensor and MAP Sensor (if equipped) are telling it. NOTE: Airflow EFI systems are very sensitive to vacuum leaks, and air leaks downstream of the airflow sensor.
Consequently, if the inputs from any of these sensors is inaccurate or missing, the engine computer may not add enough fuel, allowing the fuel mixture to go lean causing a misfire that produces a hesitation or stumble when accelerating or opening the throttle.
The amount of fuel added by the computer when the throttle opens may also be insufficient if the fuel injectors are dirty or fuel pressure is low. The oxygen sensors in the exhaust monitor the air/fuel mixture so the computer can adjust fuel trim as needed to maintain the proper air/fuel ratio. Fuel trim adjustments can compensate for dirty injectors and/or low fuel pressure to a certain extent, but occur too slowly to offset a throttle hesitation problem.
Vacuum leaks will typically cause the fuel trim to run rich as the computer tries to compensate for the extra air being sucked into the engine through the leak.

Possible Causes of Engine Hesitation or Stumble:


* Dirty fuel injectors (cleaning the injectors often fixes this).
* Bad MAP (manifold absolute pressure) sensor
* Bad TPS (throttle position) sensor
* Bad or dirty MAF (mass airflow) sensor
* Low fuel pressure (leaky fuel pressure regulator, weak fuel pump or low system voltage or charging voltage that causes the fuel pump to run slow)
* Vacuum leaks (intake manifold, vacuum hoses, throttle body, EGR valve)
* Bad gasoline (fuel contaminated with water or too much alcohol)

Sometimes, what feels like a hesitation is actually ignition misfirerather than lean misfire. The causes of ignition misfire may include:

* Dirty or worn spark plugs
* Bad plug wires
* Weak ignition coil
* Wet plug wires
using scan tool to diagnose hesitation
A scan tool that can display sensor data and fuel trim values can help you diagnose a hesitation problem.

DIAGNOSE ENGINE HESITATION PROBLEM

Diagnose may require checking the engine computer with a scan tool for any fault codes (including misfire codes), checking sensor response with a scan tool by looking at the various sensor PIDS (sensor values displayed on the scan tool), and testing sensors with a DVOM or scope if the values are out of range or the sensor is not responding normally. Additional diagnostic checks may include searching for vacuum leaks, inspecting/cleaning the EGR valve, measuring fuel pressure and volume, removing and inspecting the spark plugs, etc.
You can use a scan tool to check the fuel trim readings to see if the engine is running lean. Lean mixtures that are caused by vacuum leaks will have the most noticeable effect at idle. At part and full throttle, there is so much air entering the engine that a little extra air from a vacuum leak has a negligible effect.

Plug your scan tool into the diagnostic connector and start the engine, then look at the Short Term Fuel Trim (STFT) and Long Term Fuel Trim (LTFT) values. Normal range is typically plus or minus 8. If the numbers are +10 or higher for STFT and LTFT, the engine is running LEAN. If you rev the engine to 1500 to 2000 rpm and hold it for a minute or so, and the STFT value drops back down to a more normal reading, it confirms the engine has a vacuum leak at idle. If the STFT value does not change much, the lean fuel condition is more likely a fuel delivery problem (weak fuel pump, restricted fuel filter, dirty fuel injectors or a leaky fuel pressure regulator) than a vacuum leak.

DIAGNOSTIC TIPS FOR P0171 OR P0174 LEAN TROUBLE CODES

A code P0171 or P0174 (or both) indicate the engine is running lean. This means there is too much air and/or not enough fuel.
If you have a scan tool that can display Short Term Fuel Trim (STFT), you can confirm the engine is running lean by looking at the STFT at idle. If STFT is greater than about 10 to 12, the engine is running LEAN. Increase engine speed to 1600 to 2000 rpm and hold for a minute or so, then recheck the STFT value. If it has dropped 3 or 4 points or more, the lean problem is due to a vacuum leak (vacuum leaks have more of an impact on the idle fuel mixture than the cruise mixture). If the STFT valve is still the same, the problem is probably sensor-related (dirty or bad MAF sensor, or bad MAP sensor), or is due to low fuel pressure. The next steps would be to use the scan tool to look at the airflow and MAP sensor readings, and to check fuel pressure.
A lean fuel condition can be caused by:

* Low fuel pressure due to a weak pump or leaky fuel pressure regulator. (use a fuel pressure gauge to check fuel pressure at idle)

* Dirty fuel injectors. (try cleaning the injectors)

* Vacuum leaks at the intake manifold, vacuum hose connections or throttle body. (Check for vacuum leaks)

* Leaky EGR valve. (Check the operation of the EGR valve)

* Leaky PCV Valve or hose. (Check valve and hose connections)

* Dirty or defective Mass Airflow Sensor (MAF). (Try cleaning the MAF sensor wires or filament with aerosol electronics cleaner. Do NOT use anything else to clean the sensor, and do not touch the sensor wires)

TIP: On many Fords, a P0171 and/or P0174 Lean Code may sometimes appear because of a bad Differential Pressure Sensor (DPFE). This sensor monitors EGR flow, and is located on the engine near the EGR valve. There are two hoses that connect the sensor to the tube that runs from the exhaust manifold to the EGR valve. The sensor misreads EGR flow and the computer increases EGR which has a leaning effect on the fuel mixture. The fix is to replace the DPFE sensor.

REPAIRS

Repairs will depend on what is causing the hesitation. If the cause is fuel related, it may require cleaning the fuel injectors or fixing a vacuum leak. If the cause is ignition related, it may require replacing the spark plugs and plug wires.

Engine & Driveability Problems: 13 Diagnose Engine Stalling Problem

engine stalling misfiring

Diagnose Engine Stalling Problem

An engine that stalls repeatedly can be really annoying. So can an engine that stalls for no apparent reason while driving. Stalling problems are often temperature related and more apt to occur during cold weather or when a cold engine is first started.

 Problem: Engine stalls when cold immediately after starting
This kind of stalling problem often means the engine is not getting enough fuel and/or too much air. A cold engine needs a fairly rich fuel mixture to start, and to idle smoothly while it warms up. Any of the following could cause or contribute to this kind of stalling problem:

An engine vacuum leak.  Check for loose or broken vacuum hoses, leaks around the intake manifold gasket or throttle body, leaks around the PCV valve and EGR valve.

A dirty or defective airflow sensor. A sensor that has been contaminated by fuel varnish or dirt will under report airflow and be slow to react to changes in airflow. This can upset the air/fuel mixture causing idle, stalling and hesitation problems. Cleaning the airflow sensor wire with aerosol electronics cleaner can often restore normal operation and cure the problem.

A defective idle speed control system. Idle speed on a fuel injected engine is controlled by allowing a small amount of air to bypass the throttle. If the idle air bypass circuit is plugged with dirt or fuel varnish, or the solenoid valve is sticking or broken, the engine may not get enough air to idle normally causing it to stall. Cleaning the idle air bypass circuit in the throttle body with aerosol throttle cleaner will often remove the gunk and solve your stalling problem. If a good soaking with cleaner fails to fix the stalling problem, check the wiring connector. It might be loose or corroded. If no wiring faults are found, you may have to replace the idle speed control solenoid.

A faulty coolant sensor. If the coolant sensor is bad and tells the PCM the engine is colder or warmer than it really is, that can screw up the fuel mixture, too. If the coolant sensor reads colder than normal, or cold all the time, the engine will run rich. This won't cause cold stalling but it can make for a rough idle once the engine warms up, and it kills fuel economy. If the coolant sensor reads warmer than normal, or reads hot all the time, the PCM will lean out the fuel mixture too much, causing the engine to stall when it is cold. See the article on coolant sensors for how to test the sensor. Replacing a defective coolant sensor will cure this cause of stalling.

A faulty air temperature sensor. This sensor tells the PCM the temperature of the air entering the intake manifold. The PCM needs an accurate input so it can balance the air/fuel mixture properly. Just like a bad coolant sensor, a bad air temperature sensor can upset the fuel mixture causing stalling problems.

A bad Manifold Absolute Pressure (MAP) sensor. This sensor monitors intake vacuum, which the PCM uses to determine engine load. If the MAP sensor is not reading accurately, the PCM may add too much fuel or not enough, causing the engine to stall. See the article on MAP sensors for how to diagnose this sensor.

Low engine compression. If your engine has a lot of miles on it and compression is low because the piston rings and/or cylinders are worn, ot it has one or more leaky valves, it may not have enough oomph to keep idling. A compression check will tell you if this is a problem or not, and if it is there's no easy fix other than to overhaul or replace the engine.

Worn or fouled spark plugs. Ignition misfire can make any engine stall at idle. When the engine is running slowly, there is less momentum to keep it going, so a bad misfire may cause it to stall. If the spark plugs have not been changed in a long time, a new set of plugs and/or plug wires can restore a good hot spark and eliminate the misfire. A weak ignition coil or a faulty crankshaft position sensor may also cause a stalling problem.

Bad gas. Gasoline that contains too much alcohol (more than 10%), or gasoline that has been contaminated with water or some other substance may not burn well and cause your engine to stall. If the stalling started to occur shortly after your last fill-up, suspect bad gas. The cure is to drain the tank and refill it with fresh gas from another filling station, or just use up the bad fuel (if the engine runs okay at highway speeds), then refill at another station when the tank is near empty.

 Problem: Engine stalls when you stop for a traffic light or when idling
A stop light or idle stall often means the engine is not idling fast enough (idle speed too low), or the engine is being lugged down by a load on it created by the air conditioning compressor and/or alternator. It could also mean the fuel mixture is too rich or too lean, causing the engine to run poorly. Possible causes that may contribute to this kind of stalling include:

A Bad A/C compressor. If the A/C compressor is binding up, possibly due to a lack of lubrication, internal wear or an over-charged A/C system (too much refrigerant), it may be lugging down the engine when it is engaged. If the problem only occurs when the A/C is on, there is an issue with the compressor.

Unusually high electrical load on the charging system. If the battery is run down and the alternator is working hard to recharge it, the increases load on the engine may pull down the idle rpm to the point where it causes the engine to stall. Check the battery state of charge to see if the battery is run down or failing. If the battery is low, use a battery charger to recharge it, or drive at highways speeds for half an hour or so. If the battery is failing and is not holding a charge, time to buy a new battery.
NOTE: Low voltage can adversely affect the operation of the ignition system and fuel injectors, causing stalling and misfiring. A good charging system should produce about 13.5 to 14.5 volts at idle.

 Problem: Engine stalls unexpectedly while driving
Stalls like this are often ignition-related and happen when the engine loses spark. The underlying cause is often a bad crankshaft position sensor, or sometimes a failing ignition coil (if the engine has only one coil). A faulty ignition switch that loses contact intermittently may also cause the engine to suddenly die for no reason.
When this happens, open the hood and check for spark. This can be done by pulling off a plug wire (if the engine has plug wires), and placing the end near the block while a helper cranks the engine. DO NOT hold the wire as it may shock you if the ignition system is working. If you do not see a spark or hear the plug wire snapping when the engine is cranking, the fault is in the ignition system.

If the engine has spark, it may have died due to a loss of fuel pressure. When fuel pumps fail, they usually just quit with little or no warning. The engine usually won't restart and the vehicle has to be towed in for repairs. Listen for a buzz from the vicinity of the fuel tank when the ignition is turned on. No buzz means the fuel pump isn't running. It might just be a blown fuse or a bad relay, but on a high mileage vehicle it's often a bad fuel pump.
Another possibility is a bad PCM (engine computer) relay. The power supply to the PCM is often routed through one or two main power relays. If one of these relays loses contact momentarily, it's like pulling the plug on the PCM. The PCM shuts down and turns off the ignition and fuel injectors, causing the engine to stall. One way to see if this is a possibility is to switch or replace the PCM power relay(s). If the problem goes away, the cause was a bad relay. If it continues, the fault is something else (possible a wiring fault in the PCM relay or PCM power circuit).

Yet another possibility is low system voltage, loss of voltage, or overcharging. The PCM and other control modules require a steady 12volts to operate correctly. If the supply voltage suddenly drops below 9 volts, or surges about 16 volts, or cuts out, the PCM may temporarily kill the injectors or ignition circuit. The underlying cause may be an intermittent short somewhere in the electrical system or charging system that causes a momentary drop or surge in voltage. These can be very difficult to find, and often require hooking up a scan tool that can capture snapshot data when the stall occurs. By looking at the data, a technician can see the chain of events that caused the stall, and hopefully identify, isolate and repair the fault.

Engine & Driveability Problems: 12 Engine Vacuum Leaks

engine intake vacuum gauge reading

Engine Vacuum Leaks  

Copyright AA1Car
Have you ever tried to tune an engine only to find it won't idle or run right? Or have you ever been confronted with an engine that just doesn't seem to run right no matter what you've done or replaced? You may be dealing with an engine vacuum leak.
Sometimes a vacuum leak will whistle or hiss and make itself obvious. But oftentimes, a vacuum leak will disguise itself as an ignition or fuel problem that defies diagnosis. Either way, an engine vacuum leak is bad news because allows "unmetered" air to enter the engine and upset the air/fuel ratio.
So how do you know when a vacuum leak is causing a problem? If the engine is experiencing any of the following symptoms, a vacuum leak is probably responsible:


  • Too fast an idle speed. If an engine without computerized idle speed control is idling too fast and refuses to come down to a normal idle speed despite your best efforts to back off the carburetor idle speed screw or air bypass adjustment screw (fuel injection), air is getting past the throttle somewhere. Common leak paths include the carburetor and throttle body gaskets, carburetor insulator spacers, intake manifold gaskets, and of course, any of the engine's vacuum fittings, hoses and accessories. It is even possible that leaky O-rings around the fuel injectors are allowing air to leak past the seals. Another overlooked item can be a worn throttle shaft.
  • A rough idle or stalling. A performance cam with lots of valve overlap can give an engine a lopping idle, but so can a vacuum leak. A really serious leak can lean the air/fuel mixture out to such an extent that an engine won't idle at all. An EGR valve that is stuck open at idle can have the same effect as a vacuum leak. So too can the wrong PCV valve (one that flows too much air for the application), or a loose PCV hose. The rough idle in these cases is caused by "lean misfire." The fuel mixture is too lean to ignite reliably so it often misfires and fails to ignite at all. Lean misfire will show up as elevated hydrocarbon (HC) readings in the exhaust, enough, in fact, to cause a vehicle to fail an emissions test.
  • Hesitation or misfiring when accelerating. This may be due to a vacuum leak, but it can also be caused by a weak or inoperative accelerator pump in a carburetor, dirty injectors, or even ignition problems such as a cracked coil, worn spark plugs or incorrectly gapped plugs.
  • An idle mixture that defies adjustment. When setting the idle mixture adjustment screws on a carburetor, the idle speed should start to falter as the adjustment screws are turned in to lean out the mixture. If the screws seem to have little or no effect on idle, you have either got a carburetor problem or a vacuum leak.
The important thing to keep in mind about vacuum leaks is that they have the most noticeable effect at idle. At part and full throttle, there is so much air entering the engine that a little extra air from a vacuum leak has a negligible effect.
TIP: If you have a scan tool, look at the Short Term Fuel Trim (STFT) and Long Term Fuel Trim (LTFT) values. Normal range is plus or minus 8. If the numbers are +10 or higher for STFT and LTFT, the engine is running LEAN. If you rev the engine to 1500 to 2000 rpm and hold it for a minute or so, and the STFT value drops back down to a more normal reading, it confirms the engine has a vacuum leak at idle. If the STFT value does not change much, the lean fuel condition is more likely a fuel delivery problem (weak fuel pump, restricted fuel filter, dirty fuel injectors or a leaky fuel pressure regulator) than a vacuum leak.
For more information about using fuel trim to diagnose a lean fuel condition, see What Is Fuel Trim?, or view this article on Fuel Trim by Wells Manufacturing (PDF file).
Before we get into the various techniques of finding and fixing vacuum leaks, let's quickly review vacuum's role in fuel delivery.

WHAT IS INTAKE VACUUM?

Intake vacuum exists in the intake manifold as a result of the pumping action of the engine's pistons and the restriction created by the throttle valve. Were it not for the throttle choking off the flow of air into the engine, there would be little if any vacuum in the intake manifold (like a diesel). The downside of intake vacuum is that it creates pumping losses and reduces engine efficiency.
On older carbureted engines, vacuum is needed to pull fuel into the engine. Vacuum siphons fuel through the idle, main metering and power circuits. An engine with a vacuum leak, therefore, will likely be an engine that suffers from the symptoms of lean carburetion such as lean misfire, hesitation, stalling and rough idle. But the same symptoms can also be caused by a clogged catalytic converter or other exhaust restriction, a leaky EGR valve or valve timing problems (all of which reduce intake vacuum).
Engines with Multiport Fuel Injection and Gasoline Direct Injection don't need vacuum to pull fuel into the engine because it is sprayed in under pressure. Even so, most of these engines still have a throttle for regulating airflow and engine speed. And like the older carbureted engines, a throttle body also creates an airflow restriction that creates vacuum inside the intake manifold.


On most engines, intake vacuum should be steady between 16 and 22 inches Hg (Mercury). A lower reading usually indicates a vacuum leak, or one of the other problems just mentioned. A reading that gradually drops while the engine is idling almost always points to an exhaust restriction. An oscillating vacuum reading usually indicates a leaky valve or badly worn valve guides that leak vacuum.
Although fuel injected engines do not rely on intake vacuum to pull fuelinto the engine, vacuum leaks can upset the carefully balanced air/fuel ratio by allowing "unmetered" air to enter the engine. The result is the same kind of driveability symptoms as a vacuum leak on a carbureted engine (lean misfirehesitation when accelerating, rough idle and possibly even stalling). Common leak points include injector O-rings, intake manifold gaskets, idle air control circuit and the throttle shaft.
Fuel injected engines also rely on intake vacuum to regulate the fuel pressure behind the injectors. Fuel delivery cannot be accurately metered unless a fairly constant pressure differential is maintained. So the fuel pressure regulator diaphragm is connected to a source of intake vacuum. Vacuum working against a spring-loaded diaphragm inside the regulator opens a bypass that shunts fuel back to the tank through a return line. This causes the fuel pressure in the injector rail to rise when engine load increases (and vacuum drops). Thus, the regulator uses vacuum to maintain fuel pressure and the correct air/fuel ratio. A vacuum leak changes the equation by causing a drop in vacuum and a corresponding increase in line pressure.

MEASURING INTAKE VACUUM

Vacuum is measured with a vacuum gauge. Most are calibrated in inches Hg (Mercury), but you may also see some gauges that are also calibrated in inches of H20 (water) or kilopascals (kPa) or even bars. One inch of vacuum measured in inches Hg equals 13.570 inches in H20, 0.4898 psi (pounds per square inch) or 3.377 kPa.
Here's a conversion table you can use to convert units of measurement:
From:
To:
Result:
pressure conversion factors provided by unitconversion.org

ENGINE VACUUM LEAK DETECTION

Okay, now that we have covered what a vacuum leaks do, how do you find components that leak vacuum? One way is to visually inspect all the vacuum hoses and connections. Look for disconnected, loose or cracked hoses, broken fittings, etc. Hey, you might get lucky and find the problem in a few minutes, or you might waste half the day trying to find the mysterious leak. Vacuum leaks are often the elusive needle in a haystack. And if it is not a hose leaking vacuum but something else such as a gasket, worn throttle shaft, injector O-rings, etc., you may never find it using this technique.
A faster technique for finding intake manifold vacuum leaks is to get a bottle of propane and attach a length of rubber hose to the gas valve. Open the valve so you have a steady flow of gas. Then hold the hose near suspected leak points while the engine is idling. If there is a leak, propane will be siphoned in through the leak. The resulting "correction" in the engine's air/fuel ratio should cause a noticeable change in idle speed and/or smoothness (Note: on engines with computerized idle speed control, disconnect the idle speed control motor first).
Aerosol carburetor cleaner can also be used the same way. CAUTION: Solvent is extremely flammable, so do not smoke or use it if there are any sparks in the vicinity (arcing plug wires, for example). Spray the solvent on suspected leak points while the engine is idling. If there is a leak, the solvent will be drawn into the engine and have the same effect as the propane. The idle speed will suddenly change and smooth out.
TIP: If you have a scan tool, look at the Short Term Fuel Trim (STFT) value while you are using carb cleaner or propane to check suspected vacuum leak points. If there is a leak and some of the cleaner or propane is sucked in through the leak, you will see a momentary drop in the STFT reading. This confirms you have found a leak (keep checking because there may be multiple leaks!).
smoke leak detection machine
A smoke machine with UV dye can reveal tiny vacuum leaks.
Low pressure smoke is fed into the intake manifold, then you look for the telltale dye to find the leak.

USING A SMOKE MACHINE TO FIND ENGINE VACUUM LEAKS

A much safer technique is to use a smoke machine. These machines feed artificial smoke into the intake manifold, The smoke may also be mixed with an ultraviolet dye to make leaks easier to see. You then look for smoke seeping out of hoses, gaskets or cracks in the manifold and/or use a UV light to find the leak. This type of equipment is often needed to find small air leaks in the EVAP (evaporative emissions) control system. Smoke machines can cost $600 to $2000 or more depending on the model and features, so they are primarily for use by professional technicians.

FINDING LEAKS WITH AN EXHAUST ANALYZER

Propane can also be used in conjunction with an exhaust analyzer (do NOT use carburetor cleaner or you may damage your analyzer!). Engine vacuum leaks almost always cause fluctuating HC readings, so an infrared exhaust analyzer can (1) tell you if there is indeed a leak, and (2) where the leak is using the propane procedure.
Two types of vacuum leaks can be diagnosed with an analyzer. The first kind is a general vacuum leak (PCV hose, brake booster, etc.) that leans out the mixture and causes a very low CO reading and only a slightly higher fluctuating HC reading. The O2 reading will also be high. The second kind of vacuum leak is a "point" leak that affects only one or two cylinders (a leaky manifold gasket or a crack or porosity leak in one of the manifold runners). This will be indicated by a normal or low CO reading combined with high fluctuating HC readings. O2 will again be high.
To find a leak, feed propane at suspected leak points until you note an improvement in idle quality and/or a change in the HC/CO/O2 readings. When you have found the leak, the idle should smooth out, HC and O2 should drop and CO rise.
It is important to note that an overly lean idle mixture will also cause a fluctuating HC reading the same as a vacuum leak. To tell one from the other, there is a simple "trick" you can use. Momentarily enrich the idle mixture to 1.5 to 2.0% CO by placing a clean shop rag over the top of the carburetor. If the engine smooths out and HC drops and remains stable, the problem is a lean idle mixture adjustment. If HC still fluctuates, however, the engine is still too lean in one or more cylinders indicating a vacuum leak.

ELECTRONIC VACUUM LEAK DETECTION

If you like gadgets, there are electronic tools designed to detect vacuum leaks. An electronic vacuum leak detector will beep or flash when it detects ultrasonic vibrations that are characteristic of a vacuum leak. These tools use a sensitive microphone to listen for certain noise frequencies. Though extremely sensitive, these tools sometimes react to tiny leaks that are not really causing a problem, or "false" leaks such as the noise created by arcing inside the distributor cap or normal bearing noise in the alternator.

PRESSURE VACUUM LEAK DETECTION TECHNIQUES

Another way to find an elusive vacuum leak is to pressurize the intake manifold with about three lbs. of regulated air. This can be done by attaching a regulator to your shop air hose, then attaching the hose to a vacuum fitting or the PCV valve fitting on the intake manifold, carburetor or throttle body. Do not apply too much pressure or you may create new leaks! With the engine off and air flowing into the manifold, spray soapy water on suspected leaks. If you see bubbles, you have found the leak.
You can also use the opposite technique, which is to apply vacuum with a hand-pump to various vacuum hoses and circuits to see if they hold vacuum. But this technique means tracing the entire circuit to see where it ends, and disconnecting and plugging any parts of the circuit that do not "dead end" against a diaphragm or valve.

HOW TO REPAIR AN ENGINE VACUUM LEAK

Okay, now you have found the leak. Here are some suggestions on how to fix it:

Leaky vacuum hoses Replace them. If the end of a hose is loose or cracked, cutting it off and sticking it back on may temporarily eliminate the leak. But if the hose is rotten or age hardened, it needs to be replaced. Shortening hoses may also create additional problems. The hose may chaff or rub against other components, or pull loose as a result of engine motion and vibration. Use the correct type of replacement hose (PVC hose or vacuum hose capable of withstanding fuel vapors and vacuum without collapsing). Also, be sure the replacement hose is the same diameter and length as the original.

Carburetor or throttle body base gasket vacuum leaks Try tightening down the carburetor or throttle body mounting bolts. If that doesn't stop the leak, replace the gasket under the carburetor or throttle body. If there is a heat insulator or adapter plate under the unit, it may also have to be replaced depending on its condition. While the carburetor or throttle body is off, use a straightedge to check the base for flatness (and the manifold, too). Warped surfaces can prevent a tight seal, so if you find any it calls for resurfacing or component replacement.

Carburetor or throttle body throttle shaft vacuum leaks Wear here can only be repaired by resleeving the throttle shaft, which for all practical purposes means replacing the carburetor or throttle body with a new or remanufactured unit.

Intake manifold gasket vacuum leaks Try re torquing the intake manifold bolts, working from the center out in the recommended tightening sequence. If that fails, the intake manifold will have to be removed and the intake gaskets replaced. Sometimes the mating surface of the intake manifold or the heads will not be flat (check both with a straightedge). If warped, the intake manifold and/or heads will have to be resurfaced on a milling machine. Another problem to watch out for here are heads that have been milled or resurfaced to raise compression. To maintain proper alignment between the manifold and heads, metal also needs to be machined off the bottom of the manifold where it mates with the block, otherwise it will sit to high and the ports and bolt holes won't align.

EGR valve leaks If the valve isn't closing all the way due to carbon deposits on the stem or valve seat, cleaning may be all that is needed to cure the problem. Otherwise, the engine will need a new EGR valve.

Leaky power brake booster Replace it. But first make sure it is the booster and not just the hose or check valve that is leaking.

Engine & Driveability Problems: 11 Engine Idle Surge


idle surge caused by dirty idle speed control valve

Idle Surge

If a vehicle idles erratically and surges (idle speed is not steady and increases and decreases), the problem may be a buildup of carbon or fuel varnish deposits in the idle speed control valve (also called the idle air control valve or IAC valve). The cure for this condition is to clean the valve with some aerosol throttle cleaner or engine top cleaner.

Here's how to clean the IAC valve:
Disconnect the air intake ductwork from the throttle body.
Start the engine, then increase and hold the idle speed to 1,000 to 1,500 rpm.
Spray the throttle cleaner or engine cleaner into the throat of the throttle body, aiming for the idle air bypass port (usually located on the side or top of the throttle body opening). Give this area a good dose of cleaner (about 10 second's worth).
Turn the engine off to allow the cleaner to soak into the IAC passageway.
Wait about three minutes.
Restart the engine, rev and hold at 1,000 to 1,500 rpm, and repeat the cleaning process again.
Turn the engine off again, and reattach the air intake duct work to the throttle body.
Start the engine and rev and hold to 1,500 to 2,000 rpm until no white smoke is coming out of the exhaust pipe.
Ford idle air speed control valve
Cleaning the Idle Air Speed Control Valve with aerosol throttle cleaner can often solve an idle problem.
If this fails to make any difference, you can remove the IAC valve from the throttle body and spray cleaner directly on the tip of the valve and/or into the ports in the throttle body. Let the cleaner soak awhile, repeat as needed, then reinstall the IAC valve, start the engine and run it at 1,500 to 2,000 rpm as before until no white smoke is seen in the exahust.
If the idle speed still surges after this, the IAC valve is defective and needs to be replaced.
new Ford IAC idle speed control valve
If the old Idle Speed Control Valve fails to respond to cleaning, replace it with a new one.

Engine & Driveability Problems: 10 Engine Won't Start: No Spark

Engine Won't Start: No Spark

If your engine cranks normally but will not start because it has no spark, or it stalls and won't restart because it has no spark, the problem may be due to any of the following:

* A bad crankshaft position (CKP) sensor (on engines that do not have a distributor), or broken, loose or corroded wires from the sensor to the PCM.
* A bad ignition module (on engines that have a distributor or use an ignition module separate from the PCM)
* A bad pickup inside the distributor (on engines that have a distributor), a stripped distributor drive gear (common problem with plastic distributor drive gears), broken, loose or corroded wires from the pickup to the ignition module or PCM.
* A bad ignition coil (on engines that have a distributor and a single coil)
* A bad rotor or distributor cap (cracks or carbon tracks that are allowing the spark to short to ground)
* Faulty ignition switch.

HOW TO CHECK FOR SPARK

To confirm your engine is not starting because it has no spark, you can do any of the following to check for spark:
CAUTION: Secondary ignition voltage can shock you. Do NOT hold or touch a spark plug wire while cranking the engine.
spark plug firing
If your ignition system is working, you should see a strong hot spark at the spark plugs when the engine is cranked.
If your engine has spark plug wires, disconnect one of the plug wires from a spark plug and place the end of the wire near a metal surface on the engine. You can insert a small Phillips screwdriver into the end of the wire (the plug boot), or a small bolt or nail to provide a conductive path. Then crank the engine and look for a spark to jump from the screwdriver, bolt or nail in the end of the plug wire to the engine. If you do not see a spark, there is an ignition problem.
Remove a plug wire and insert an old spark plug or a spark plug tester into the end of the wire (the plug boot). Place the spark plug on a metal surface on the engine, or ground the spark plug tester to the engine. Then crank the engine to check for a spark. No spark indicates an ignition problem.
If an engine has a coil-on-plug ignition system with no plug wires, remove one of the coils from the spark plug and insert an old spark plug, a spark plug tester or a screwdriver into the end of the coil. Ground the spark plug or plug tester to the engine, then crank the engine and look for a spark. No spark indicates an ignition problem.
Spray some aerosol starting fluid into the throttle (CAUTION: Starting Fluid is Extremely Flammable!). Then crank the engine. If the engine starts, you do NOT have an ignition problem. The no-start is fuel related.
typical distributor ignition system 

NO-SPARK DIAGNOSIS

If the engine has no spark, check for voltage at the coil positive terminal when the ignition key is on.
If there is voltage, the problem is on the trigger side of the coil (pickup, crank sensor, ignition module or primary wiring circuit).
If there is NO voltage at the coil, the problem is on the supply side (the ignition switch or ignition wiring circuit).
If the coil has voltage, the problem may be a bad high voltage output wire from the coil to the distributor, hairline cracks in the coil output tower, or cracks or carbon tracks inside the distributor cap or on the rotor.

distributor cap

SCAN TOOL IGNITION DIAGNOSIS

If you have a scan tool, plug it into the vehicle diagnostic connector and look for an rpm signal when cranking the engine. No signal? The problem is either a bad distributor pickup (on engines with a distributor), a stripped distributor drive gear (common with plastic gears), a bad crankshaft position sensor (on engines without a distributor), a wiring fault (broken or shorted wire, or a loose or corroded wiring connector).
If the Check Engine Light is on, use a scan tool to check for ignition-related fault codes. Any coil-related codes (P0351 to P0358) would require testing the coil(s). Misfire codes would tell you the spark plugs and/or plug wires need to be checked.

IGNITION COIL CHECKS

The ignition coils in DIS ignition systems function the same as those in ordinary ignition systems, so testing is essentially the same. But the driveability symptoms caused by a weak coil or dead coil will be limited to one or two cylinders in a DIS ignition system with a bad coil rather than all the cylinders on an engine with a distributor and single coil.

Most DIS no start problems are caused by a bad crank position sensor.
Many DIS systems use the "waste spark" setup where one coil fires a pair of spark plugs that are opposite one another in the firing order. Others, including the newer coil-over-plug systems, have a separate coil for each spark plug.
Individual DIS coils are tested in essentially the same way as epoxy-filled (square-type) ignition coils. First, isolate the coil pack by disconnecting all the leads. Set the ohmmeter in the low range, and recalibrate if necessary. Connect the ohmmeter leads across the ignition coil primary terminals, and compare the primary resistance reading to specifications (typically less than 2 ohms). Then connect the ohmmeter leads across the coil secondary terminals and compare the secondary resistance reading to specifications (typically 6,000-30,000 ohms). If readings are outside the specified range, the coil is defective and needs to be replaced.
If measuring the secondary resistance of a DIS coil is difficult because of the coils location, try removing the wires from the spark plugs and measure secondary resistance through the plug wires rather than at the secondary terminals on the coils. Just remember to add in a maximum of 8,000 ohms of resistance per foot for the plug wires.

DIS MODULE & SENSOR CHECKS

Here is a little trick that will literally show you if a DIS ignition module and its crankshaft sensor circuit are working: connect a halogen headlamp to the spade terminals that mate the DIS module to the coils. A headlamp is recommended here because it puts more of a load on the module than a test lamp. If the headlamp flashes when the engine is cranked, the DIS module and crankshaft position sensor circuit are functioning. Therefore, the problem is in the coils.
If the headlamp does not flash, or there is no voltage to the module or coil pack when the engine is cranked, the problem is most likely in the crankshaft sensor circuit. On most vehicles, a bad crank position sensor will usually set a fault code, so use a scan tool to check for a code. Or, check the crank sensor itself.
Magnetic crank sensors can be tested by unplugging the electrical connector and checking resistance between the appropriate terminals. If resistance is not within specs, the sensor is bad and needs to be replaced.

Magnetic crank position sensors produce an altering current when the engine is cranked so a voltage output check is another test that can be performed. With the sensor connected, read the output voltage across the appropriate module terminals while cranking the engine. If you see at least 20 mV on the AC scale, the sensor is good, meaning the fault is probably in the module. If the output voltage is low, remove the sensor and inspect the end of it for rust or debris (magnetic sensors will attract iron and steel particles). Clean the sensor, reinstall it and test again. Make sure it has the proper air gap (if adjustable) because the spacing between the end of the sensor and the reluctor wheel or notches in the crankshaft will affect sensor output voltage. If the air gap is correct and output is still low, replace the sensor.

Hall effect crankshaft position sensors typically have three terminals; one for current feed, one for ground and one for the output signal. The sensor must have voltage and ground to produce a signal, so check these terminals first with an analog voltmeter. Sensor output can be checked by unplugging the DIS module and cranking the engine to see if the sensor produces a voltage signal. The voltmeter needle should jump each time a shutter blade passes through the Hall effect switch. If observed on an oscilloscope, you should see a square waveform. No signal would tell you the sensor has failed.

Engine & Driveability Problems: Engine Idles Rough or Misfires: 9 Diagnose Engine Misfire

misfiring spark plug

Diagnose Engine Misfire

Misfire is a common driveability problem that may or may not be easy to diagnose, depending on the cause. A misfiring cylinder in a four-cylinder engine is, pardon the pun, hard to miss. The loss of 25% of the engine's power output is the equivalent of a horse trying to run on three legs. The engine may shake so badly at idle that it causes vibrations that can be felt in the steering wheel and throughout the vehicle. The engine also may be hard to start and may even stall at idle, depending on the accessory load (air conditioning, headlights and electric rear defroster, for example).
When misfire occurs, performance suffers along with fuel economy, emissions and idle quality. And, when a misfiring vehicle is subjected to an emissions test, it will usually fail because of the unusually high levels of hydrocarbons (HC) in the exhaust.

ENGINE MISFIRE CODES

The Onboard Diagnostic (OBD II) system on 1996 and newer vehicles monitors misfires and will set a Diagnostic Trouble Code (DTC) if the misfire rate exceeds a certain value that may cause emissions to increase. In cases of severe misfire, the Check Engine light may illuminate or flash while the engine is misfiring. The codes can be read by plugging a scan tool into your vehicle's diagnostic connector located under the dash near the steering column.
The last two digits in the misfire code will tell you which cylinder or cylinders are misfiring. The digits correspond to the cylinder number in the engine's firing order:

P0300....Random Misfire Code (multiple cylinders involved)
P0301....Cylinder 1 Misfire Detected
P0302....Cylinder 2 Misfire Detected
P0303....Cylinder 3 Misfire Detected
P0304....Cylinder 4 Misfire Detected
P0305....Cylinder 5 Misfire Detected
P0306....Cylinder 6 Misfire Detected
P0307....Cylinder 7 Misfire Detected
P0308....Cylinder 8 Misfire Detected
P0309....Cylinder 9 Misfire Detected
P0310....Cylinder 10 Misfire Detected
P0311....Cylinder 11 Misfire Detected
P0312....Cylinder 12 Misfire Detected

CAUSES OF ENGINE MISFIRE

What causes a cylinder to misfire? Basically, it's one of three things: loss of spark; the air/fuel mixture is too far out of balance to ignite; or loss of compression. Loss of spark includes anything that prevents coil voltage from jumping the electrode gap at the end of the spark plug. Causes include worn, fouled or damaged spark plugs, bad spark plug wires or even a cracked distributor cap. A weak coil or excessive rotor gas inside a distributor would affect all cylinders, not just a single cylinder.
spark plug firing
Spark plug fouling is a common cause of ignition-related misfires.
"Lean misfire" can occur when the air/fuel mixture is too lean (not enough gasoline in the mixture) to burn. This can be caused by a dirty, clogged or inoperative fuel injector; air leaks; or low fuel pressure because of a weak pump, restricted filter or leaky pressure regulator. Low fuel pressure would affect all cylinders rather than an individual cylinder, as would most air leaks. A leaky EGR valve can also have the same effect as an air leak. In fact, if a vehicle has one or more misfire codes and a P0401 EGR code, the fault is likely carbon buildup under the EGR valve.

Loss of compression means the cylinder loses most of its air/fuel mixture before it can be ignited. The most likely causes here are a leaky (burned) exhaust valve or a blown head gasket. If two adjacent cylinders are misfiring, it's likely the head gasket between them has failed. Also, if an engine is overheating or losing coolant, it's likely the head gasket is the culprit.

Intermittent misfires are the worst kind to diagnose because the misfire comes and goes depending on engine load or operating conditions. They seem to occur for no apparent reason. The engine may only misfire and run rough when cold but then smooth out as it warms up. Or, it may start and idle fine but then misfire or hesitate when it comes under load. Also, it may run fine most of the time but suddenly misfire or cut out for no apparent reason.

Engine misfire can be felt at idle as a shaking or vibration.
At higher engine speeds, the engine may cutout, stumble or lose power.

MISFIRE DIAGNOSIS WITH A SCAN TOOL

If you find one or more misfire codes when you check for fault codes with a scan tool, the codes by themselves do NOT tell you WHY the cylinder is misfiring. It could be ignition, compression or fuel related. However, if you find a P0304 misfire code for cylinder number 4, and also a P0204 code (P0200 series codes cover the injectors), you'd know the misfire was probably caused by a bad injector.


If there are any EGR codes (P0401 for example), the misfire could be due to carbon buildup under the EGR valve.
If there is a lean code (P0171 or P0174), the problem could be a dirty fuel injector.
If there are no other codes except for the misfire code, check the ignition components for that cylinder. The cause could be a badly worn or fouled spark plug, a bad plug wire, carbon tracking or moisture inside the boot of a coil-on-plug ignition coil, or a weak or defective coil in a multi-coil distributorless ignition system.
If you find a P0300 random misfire code, it means the misfire is random and is moving around from cylinder to cylinder. The cause here would likely be something that upsets the engine's air/fuel mixture, such as a major vacuum leak, a leaky EGR valve or unusually low fuel pressure (weak pump or faulty pressure regulator).
If your engine seems to be misfiring, but there are NO codes set (no individual cylinder misfire codes or no random misfire code), and you have a professional grade scan tool that can access Mode $06 data, you can use the scan tool to look at the raw misfire data that is being tabulated for each cylinder. Normally the misfire counts should be zero or close to zero for every cylinder. The OBD II system will usually NOT set a misfire code until the actual misfire count exceeds about two percent for any given cylinder. So by looking at the actual Mode $06 misfire data, you should be able to see any cylinders that are showing an abnormally high misfire rate.
For example, if the Mode $06 scan tool data shows zero or close to zero misfires for all cylinders except cylinder number four (which has a count of say 80 or higher), that would tell you cylinder number four has an ignition, fuel or compression problem that will require further diagnosis.

FINDING THE CAUSE OF A STEADY OR CONTINUOUS MISFIRE

In the case of a steady misfire, isolating the misfiring cylinder is the first step in diagnosing the problem. The old-fashioned method for finding a weak cylinder is to temporarily disconnect each of the spark plug wires, one at a time, while the engine is idling. When there's no change in the idle speed, then you have pinpointed the weak cylinder.
A power balance test will tell you the same thing, but this requires some hookups and an engine analyzer. A power balance test is preferable to pulling plug wires, because it keeps you away from the voltage and prevents the voltage from causing any damage to the electronics in the ignition system.
When a plug wire is physically disconnected from a spark plug, the high voltage surge from the coil cannot follow its normal path to ground through the plug wire and spark plug, so it passes back through the coil. Most ignition systems are robust enough to withstand such voltage backups intermittently but not on a prolonged basis. If the coil or ignition module is already weak, it may push the component over the brink causing it to fail.

ADVANCED MISFIRE DIAGNOSTICS WITH A DIGITAL STORAGE OSCILLOSCOPE

A weak cylinder will stick out like a sore thumb on an ignition scope or a digital storage oscilloscope (DSO). The secondary parade pattern will reveal the firing voltages for each cylinder. The number one cylinder will be the first one on the display, followed by each of the other cylinders in their respective firing order, moving across the screen from left to right.
If the peak firing voltage for any cylinder is significantly higher or lower than the others, it indicates a problem. An usually low firing voltage would tell you the spark is finding a shortcut to ground. A fouled, shorted or cracked spark plug; arcing past the spark plug boot to ground; and a shorted plug wire would be the most likely causes. An unusually high firing voltage in a cylinder would tell you the spark plug electrode is too wide or too badly worn or that the plug wire is open.

If the firing voltages for all the cylinders are about equal with the engine idling, a snap-kV test will help you find a misfire that occurs when the engine is under load. To conduct this test, suddenly open the throttle wide and then let it fall back while observing the firing pattern on the scope. All the firing voltages should increase during the snap-kV acceleration test, but, if any individual cylinder increases significantly more or less than its companions, it indicates trouble.

A snap-kV voltage spike that is taller than the rest indicates high resistance in the ignition secondary to the affected cylinder. Check for excessive resistance or an open in the plug wire. A spike that is much shorter than the rest indicates loss of voltage. Check for a shorted, cracked or damaged spark plug, arcing across the spark plug boot or a shorted plug wire. Misfire under load accompanied by low overall spike heights during the snap-kV test would tell you the available voltage from the coil is low. The most likely cause, in this case, would be a faulty ignition coil. But low battery voltage might also be a factor, too. Be sure to check the battery and charging voltage.
The next thing you should look at is the primary pattern for the suspicious cylinder. The primary pattern can reveal additional pieces in the diagnostic puzzle. The primary pattern will show when the coil starts to charge, the peak or "arc-over" firing voltage (which you've already looked at and determined was higher or lower than normal), the "spark burn line" and coil oscillations.

The spark burn line is the part of the waveform that immediately follows the firing voltage spike. The height of this line can tell you if the air/fuel mixture is running rich or lean. If the fuel mixture is lean, then the spark burn line will be higher than normal. If the air/fuel mixture is rich, then the spark burn line will be lower than normal.
A lean mixture in a single cylinder can be caused by a leaky intake manifold gasket, air leakage past injector O-rings, a leaky EGR valve (if the valve is adjacent to the cylinder intake port) or a dirty, plugged or inoperative fuel injector. Loss of compression because of a leaky (burned) exhaust valve or a leaky head gasket can also affect the spark burn line in the same way.

Note: If the spark burn lines for all the cylinders are higher than normal (indicating a lean fuel mixture), the underlying cause would be something that affects all cylinders such as an intake manifold vacuum leak, leaky vacuum hose, leaky EGR valve, leaky throttle gasket or low fuel pressure (weak fuel pump or bad pressure regulator).

A rich fuel mixture in an individual cylinder is less common but can occur if the fuel injector leaks. A more common condition would be a rich condition in all cylinders caused by a dead oxygen sensor or coolant sensor that prevents the computer from going into closed loop, or by a faulty fuel pressure regulator that feeds too much pressure to the injectors.
Something else to look at in the spark burn line is the amount of "hash" it contains. A good cylinder will show a relatively clean line with little hash. A lot of hash, on the other hand, occurs when ignition misfire or lean misfire are present.

The duration or length of the spark burn line can provide more clues about what's going on inside the cylinder. If the duration of the burn line is longer than about 2 milliseconds, the air/fuel mixture is running abnormally rich for any of the reasons just given. If the burn line is shorter than about 0/75 milliseconds, then the cylinder is running too lean.
The last thing you want to look at in the primary ignition pattern is coil oscillations. If the coil is good, there should be at least two and preferably three or more oscillations after the burn line. Fewer oscillations would indicate a faulty coil.

IGNITION AND COMPRESSION MISFIRES

If you have a misfire and have isolated it to one cylinder, the cause will be obvious when you remove the spark plug. If the plug's insulator is cracked or broken, you've found the problem. If the plug appears to be OK but is wet, inspect the plug wire and boots for damage. Measure the plug wire's resistance, end to end, with an ohmmeter. Refer to the vehicle manufacturer's specifications, but, as a rule, resistance should not exceed 8,000 ohms per foot. Replace the wire if resistance exceeds specifications.


If the plug is fouled, you've found the source of the misfire, but you still have to determine what caused the plug to foul. Heavy black oily carbon deposits would tell you that the engine is burning oil. The most likely cause is worn valve guide seals and/or guides, but worn rings and cylinders can also allow oil to enter the combustion chamber. Replacing the spark plug will temporarily cure your customer's misfire problem, but, until the oil consumption problem is fixed, the engine will continue to foul plugs.

A leakdown test or compression test will help you determine if the oil is getting past the valve guides or the rings. If the cylinder shows little leakdown or holds good compression when a little oil is squirted into the cylinder (wet compression test), it would tell you that the engine needs new valve guide seals and/or guide work. Most late model engines have positive valve guide seals. Often, the guides are fine, but the seals are worn or cracked. The seals can be replaced on some engines without too much effort and without having to remove the head.

Just pull off the valve cover, remove the valvetrain hardware and use an external spring compressor to remove the springs so new seals can be installed. A regulated air hose connected to the spark plug hole will keep the valve from dropping into the cylinder. But, on many OHC engines, there's so much disassembly involved to get to the valve springs you may have to remove the head.
A spark plug that shows heavy whitish to brown deposits may indicate a coolant leak either past the head gasket or through a crack in the combustion chamber. This type of problem will only get worse and may soon lead to even greater problems if the leak isn't fixed. Coolant makes a lousy lubricant and can cause ring, cylinder and bearing damage if it gets into a cylinder or the crankcase.

Loss of coolant can also lead to overheating, which may result in cracking or warping of aluminum cylinder heads. If you suspect this kind of problem, pressure test the cooling system to check for internal coolant leakage.
Spark plugs that show preignition or detonation damage may indicate a need to check timing, the operation of the cooling system and conditions that cause a lean air/fuel mixture. You might also want to switch to a colder heat range plug.
Short trip stop-and-go driving can cause a rapid buildup of normal deposits on plugs, especially if the engine has a lot of miles and there has been some oil leakage past the valve guide seals and rings. The cure here might be to switch to a one-step hotter spark plug.

If the spark plug and plug wire are OK but the cylinder is weak, a leakdown or compression test should be done to determine if the problem is compression related. The exhaust valves are the ones most likely to lose their seal and leak compression, so, if you find unusually low compression, follow up with a wet compression test to determine if the problem lies with the valves or rings.
No change in compression with a wet test would tell you the problem is valve related (probably a bad exhaust valve) or a blown head gasket. But, if the compression readings are significantly higher with a wet compression test, it would tell you the piston rings and/or cylinder walls are worn.
Either way, your customer is looking at major repairs. The only cure for a leaky valve is a valve job, and the only cure for a leaky head gasket is to replace the gasket. Likewise, the only cure for worn rings and cylinders is to overhaul or replace the engine.
Low compression can also be caused by a rounded cam lobe. If the valve doesn't open, the cylinder can't breathe normally and compression will be low. A visual inspection of the valvetrain and cam will be necessary if you suspect this kind of problem.
fuel injector and spark plug ignite fuel mixture
A dirty fuel injector or fouled spark plug can cause misfires.

FUEL RELATED MISFIRES

If the ignition components and compression in a misfiring cylinder are fine, that leaves a fuel related problem as the only other possibility. You can start by checking for voltage at the injector. A good injector should also buzz while the engine is running. No buzzing would tell you the injector is dead, while a no-voltage reading would tell you it isn't the injector's fault but a wiring or computer driver problem.
If the injector is buzzing and spraying fuel but the cylinder isn't getting enough fuel, the injector is dirty or clogged. On-car cleaning may help remove the varnish deposits that are restricting the injector and restricting fuel delivery, but chances are, if the injector is clogged enough to cause a steady misfire, it will have to be removed for off-car cleaning or be replaced.

You can also observe injector performance on a scope, and check its response to changes in the air/fuel mixture. First of all, a flat line would tell you the injector is dead or is not receiving voltage (depending on where the line falls on the screen). If the injector is working, the line should drop when the injector turns on, then peak when the current is switched off.
The injector scope pattern will tell you how long the injector is on. If you make the air/fuel mixture artificially lean by momentarily pulling off a vacuum hose, and/or artificially rich by feeding some propane into the manifold, you should see a corresponding change in the injector on time as the computer responds to input from the oxygen sensor. No change would tell you either the O2 sensor is dead or there's a problem in the computer.
One thing that should always be checked if an injector is removed for cleaning and/or testing is its spray pattern. A good injector should produce a cone-shaped mist of fuel vapor. If you see solid streamers in the spray pattern or a solid stream of fuel, the injector needs attention. If off-car cleaning fails to restore the normal spray pattern, the injector must be replaced.

If you're dealing with a random misfire that can't be isolated to a particular cylinder, all the injectors may be dirty. You should also check fuel pressure to see if the pump is weak or the pressure regulator is defective. A plugged fuel filter can reduce fuel pressure. If fuel pressure is within specifications, check the intake vacuum to see if there is an air leak that's upsetting the overall air/fuel mixture. A couple of overlooked causes here may be a leaky EGR valve or a leaky power brake booster.

Engine & Driveability Problems: Engine Won't Start, No Fuel (Bad Fuel Pump?): 8 Diagnose Fuel Pump

diagnose fuel pump

Diagnose Fuel Pump

If the fuel pump is not delivering adequate fuel pressure and volume to the engine, the engine may not start or run properly. Low fuel pressure can cause hard starting, a rough idle, misfiring, hesitation and stalling. No fuel pressure will prevent the engine from starting, or will cause the engine to quit running if the fuel pump fails while driving.
Fuel injected engines are very sensitive to fuel pressure as well as fuel volume. Low pressure will cause starting and driveability problems. A pump that can deliver adequate pressure but not enough volume may allow the engine to start and idle normally, but it will starve the engine for fuel and cause a loss of power when the engine is under load, accelerating hard or cruising at highway speeds.

Engine Cranks But Will Not Start

A dead fuel pump can prevent an engine from starting, but so can a problem with the ignition system or the engine itself (such as a broken timing belt).
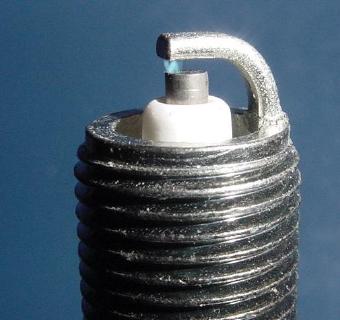
The first thing to check would be spark. This can be done by connecting a spark plug tester to a plug wire while the engine is cranking. The tester must be grounded to the engine block for a good electrical connection.

CAUTION: Do not touch any of the spark plug wires while the engine is being cranked or you may get a bad shock!
If an engine has a coil-on-plug ignition system, and it is possible to remove one of the coils, do so and place a spark plug in the end of the coil. Then place the coil and plug so the plug is touching metal on the engine.
If the ignition system is working properly, you should see a series of sparks while cranking the engine. No spark would indicate an ignition problem such as a bad crankshaft position sensor, ignition module or ignition coil.

Next, check the timing belt if the engine has an overhead camshaft and rubber timing belt. The belt is usually enclosed inside a plastic cover on the end of the engine. Removing a couple of screws from the cover and pulling the cover back should allow you to see the belt. If the belt looks okay, and turns when the engine is cranked, compression is probably not your problem. Timing belts can jump time if they loosen up or if the cogs on the underside of the belt become damaged. It's also possible for the overhead camshaft to seize or break if the engine has run low on oil or has overheated. But if the cam gear turns when the engine is cranked, that's probably not the problem either.

CAUTION: Keep your fingers away from the belt and gears while cranking the engine!
If ignition and compression are both OK, that leaves a lack of fuel as the most likely cause of the no start. But is it the fuel pump or something else?

Possible causes of a fuel-related no start include:

1. A dead fuel pump (could be the pump, pump relay pump fuse or a fault in the pump wiring circuit)
2. A plugged fuel filter
3. Low fuel pressure (weak pump, restricted fuel line, low voltage to the pump or a defective fuel pressure regulator)
If the pump runs and generates normal pressure to the engine, but the engine still does not start, the problem may be:
1. No voltage to the fuel injectors (blown injector fuse or bad relay)
2. No pulse signal to the injectors from the PCM (no crank or cam sensor input to the PCM, or a bad driver circuit in the PCM, or a wiring harness problem)
3. A shorted fuel injector (robs voltage from the other injectors so none will operate)


fuel pump gauge

Fuel Pump Checks

One of the first things to check is the fuel pump. Does the pump run when the engine is cranking? The pump should make a little noise. No noise would tell you the pump is not spinning.


On most vehicles the pump is energized by the PCM via a relay. When the ignition key is first turned on, the PCM energizes the fuel pump relay for a couple of seconds so the pump will run to build up pressure. The PCM then shuts off the fuel pump relay (which turns off the pump) if it does not receive an rpm signal from the engine indicating the engine has started after cranking. The pump circuit also may be wired though an oil pressure switch and/or an inertia safety switch that kills the pump in case of an accident. Refer to the wiring diagram to find out what is involved before jumping to any conclusions.

A bad fuel pump relay will prevent the fuel pump from running. Locate the fuel pump relay in the engine compartment (it is usually in the power center). Remove the relay and shake it. If you hear anything rattling inside the relay, the relay is broken and needs to be replaced.
To test the fuel pump, bypass the relay to route power directly to the fuel pump. If the fuel pump runs when the relay is bypassed, the problem is a bad relay or a fault in the wiring circuit that provides power to the relay. Bypassing a relay can be tricky because you have to know which terminals to jump. So before you attempt this procedure, you must look up the fuel pump wiring diagram for your vehicle in a manual or online.

One new tool we found recently (see below) makes bypassing a fuel pump relay much easier and requires no wiring diagrams or jumper wires. The tool is a fuel pump bypass relay. It is a replacement relay that has an ON-OFF rocker switch on top. All you do is replace your fuel pump relay with the test relay, flip the switch to energize the fuel pump and see if the fuel pump runs. If the pump works, the problem is a bad relay. If nothing happens, the problem is a bad fuel pump or a fault in the wiring between the relay and pump. The tool is made by IPAtools and comes in a kit that includes 6 different relays that fit a variety of import and domestic vehicles:

fuel pump relay bypass tool
Fuel pump relay bypass tool allows you to energize and test the fuel pump.

Other electrical problems that can affect the pump include low voltage in the pump's power supply circuit or high resistance in the pump's ground connection. Either may prevent the pump from running or spinning fast enough to generate normal fuel pressure.

Measuring Fuel Pump Pressure

Depending on the application, the fuel system may require anywhere from 30 to 80 psi of fuel pressure to start and run. NOTE: Fuel injected engines are VERY sensitive to fuel pressure. If pressure at the engine fuel rail is even a couple pounds less than specifications, the engine may not start or run well, or experience hesitation or stalling problems.
Pressure specifications will vary according to the type of fuel injection system on the engine as well as the performance, fuel economy and emission requirements of that particular model year vehicle. There are no rules of thumb. Every application is different, so always look up the pressure specs when troubleshooting fuel-related performance problems.
When there is too much fuel pressure, the engine runs rich. This causes an increase in fuel consumption and carbon monoxide (CO) emissions. An engine that is running really rich also may experience a rough idle, surging and possibly even carbon-fouled spark plugs.
When there is not enough fuel pressure, the engine may not start. Or if it does, it may idle roughly and run poorly. Low fuel pressure creates a lean fuel condition that can cause lean misfire, hesitation, rough idle, hesitation and misfire on acceleration.

To check fuel pressure, you need a gauge and a place to attach it. There are a number of different checks that can be made, including static or rest pressure (key on, engine off), residual fuel pressure, running pressure, maximum or "dead head" pressure and volume of fuel delivered. The fuel pressure regulator also should be tested, and a fuel pressure drop test performed to check for dirty fuel injectors.

fuel injection, fuel injector testing

Different vehicle manufacturers recommend different test procedures. On many European EFI systems, the OEMs recommend using a static pressure test with the engine and ignition off. This is done by bypassing the fuel pump relay and energizing the pump directly. Most domestic and Asian vehicle manufacturers, on the other hand, provide a test fitting on the fuel rail so pressure can be checked with the engine running.
If you are working on a vehicle that does not have a pressure test fitting, you will have to tee a pressure gauge into the fuel line just ahead of the injector fuel rail.

Caution: Before hooking up your pressure gauge, relieve all pressure in the fuel system.
Static Fuel Pressure TestWith the key on, engine off (or with the fuel pump energized), fuel pressure should come up quickly and hold steady at a fixed value. Compare the pressure reading to specifications. If you get no pressure reading, check for voltage at the pump. If there is voltage but the pump is not running, you have found the problem: a bad fuel pump.

fuel injection test port

If you do get a pressure reading but the reading is lower than normal, the cause may be a weak pump, a blockage in the fuel line, filter or tank inlet sock, or a faulty pressure regulator. Also, low voltage at the pump may prevent it from spinning fast enough to build up normal pressure. Check the voltage at the pump. If OK, check the fuel filter and lines for obstructions and the operation of the fuel pressure regulator before you condemn the pump.

Residual Fuel Pressure TestWhen the pump is turned off or stops running, the system should hold residual pressure for several minutes (look up the specs to see how much pressure drop is allowed over a given period of time). If pressure drops quickly, the vehicle may have a leaky fuel line, a leaky fuel pump check valve, a leaky fuel pressure regulator or one or more leaky fuel injectors. Low residual fuel pressure can cause hard starting and vapor lock during hot weather.

Running Fuel Pressure TestWith the engine idling, compare the gauge reading to specifications. Fuel pressure should be within the acceptable range given by the vehicle manufacturer. If low, the problem may be a weak pump, low voltage to the pump, a clogged fuel filter, line or inlet sock inside the fuel tank, a bad fuel pressure regulator, or nearly empty fuel tank.

Dead Head PressureThis checks the maximum output pressure of the fuel pump. With the return line pinched shut, the pump should produce two times its normal operating pressure at idle. If the pressure rating does not go up with the return line blocked, the pump may not be able to deliver enough fuel at higher engine speeds. Possible causes include a worn pump, low voltage at the pump, a plugged fuel filter or inlet sock in the tank, an obstructed fuel line or almost empty fuel tank.
fuel pump volume test

Fuel Volume Test

A fuel pump that delivers normal pressure may still cause driveability problems if it can't deliver enough fuel volume to meet the engine's needs. A fuel volume test may therefore be the best way to evaluate the pump's condition.
A fuel volume test measures the volume of fuel delivered over a specified interval. This test can be done by connecting a fuel flow gauge into the fuel supply line, or by disconnecting the fuel return line from the fuel pressure regulator and connecting a hose from the regulator to a large container. Caution: Make sure there are no open sparks or flames nearby while doing this test!
With the engine off, energize the pump and measure the volume of fuel delivered during the specified interval of time. As a rule, a good pump should deliver about 3/4 to one quart of fuel in 30 seconds.
Causes of low fuel volume delivered include a worn fuel pump, a plugged fuel filter or inlet sock in the tank, obstructed fuel line or nearly empty tank. Don't forget that low voltage at the pump can also prevent it from running fast enough to generate adequate fuel flow. The pump's supply voltage should be within half a volt of normal system voltage. If it is low, check the wiring connectors, relay and ground.

fuel pressure regulator

Fuel Pressure Regulator Tests

This test checks the operation of the fuel pressure regulator to make sure it changes line pressure in response to changes in engine vacuum. This is necessary to maintain the proper operating pressure behind the injectors and to compensate for changes in engine load.
With the engine running, disconnect the vacuum hose from the pressure regulator. As a rule, fuel system pressure should increase 8 to 10 psi with the line disconnected. No change would indicate a faulty pressure regulator, or a leaky or plugged vacuum line.
Also, when the vacuum hose is disconnected from the regulator, check the inside of the hose for any wetness that would indicate fuel is being sucked into the hose. There should be none. If the inside of the hose is wet, it means the diaphragm inside the regulator is leaking. This will cause a drop in fuel pressure, and allow fuel to be sucked into the intake manifold upsetting the air/fuel mixture. If the diaphragm is leaking, replace the regulator.

Fuel Pressure Drop Test

This test measures the drop in static system fuel pressure when each injector is energized. The amount of pressure drop for each injector is then compared to see if the injectors are dirty and need to be cleaned or replaced. This test requires an "injector pulser" tool to energize the injectors.


To perform this test, turn the key on or energize the fuel pump for a few seconds to build up static pressure in the fuel system. Then turn the key off, pulse one injector for the specified time and note the pressure drop for that injector. Turn the key back on to rebuild static pressure and repeat the test for each of the remaining injectors.

An injector that is pulsed 100 times for five milliseconds should produce a minimum pressure drop of about 1 to 3 psi, and no more than 5 to 7 psi, depending on the application.
The difference in pressure drop between all the injectors should be 2 psi or less. If you see more than 3 psi difference between the highest and lowest readings, the injectors are dirty and need to be cleaned or replaced.

If you see no pressure drop when an injector is energized, the injector is clogged or defective and needs to be replaced. If the pressure gauge needle bounces, the injector is sticking.

After cleaning, repeat the test to see if cleaning did the trick. All injectors should show about the same amount of pressure drop (less than 2 psi difference) and no more than 7 psi drop at 100 pulses for 5 milliseconds. If there is no change in the readings or the drop exceeds these limits, the injector(s) need to be replaced.

Fuel System Scan Tool Checks

If you have a scan tool that can display OBD system data, look for a fuel pressure PID. Compare the fuel pressure reading against specifications to see if it is in range or not. You can also compare the scan tool pressure reading against the actual reading on the vehicle with a gauge to see if they are the same. If the gauge reads higher, the vehicle may have a bad fuel pressure sensor. A low fuel pressure reading would confirm a weak fuel pump, low voltage to the fuel pump or a leaky fuel pressure regulator that does not allow the system to develop and hold normal fuel pressure.

You can also look at Long Term Fuel Trim (LTDT) and Short Trim Fuel Trim (STFT) values to see if the engine is running lean. A normal range is usually plus or minus 8 or less. A STFT value greater than 8 or a LTFT value greater than 10 would tell you the engine is running lean, possibly due to low fuel pressure or a weak fuel pump. Just remember that lean readings can also be caused by engine vacuum leaks and other conditions.
Fuel pumps can also be tested with a professional level scan tool that has bidirectional capabilities. On the scan tool diagnostics menu, there may be an option to run a fuel pump self-test. The test allows you to energize the pump to see if it runs, and to test the operation of a variable speed pulse-modulated pump.
You can also use any scan tool or code reader to pull fuel-related fault codes from the PCM.

Fuel System Scope Tests

By connecting a Low Amps probe to the fuel pump's voltage supply wire, you can view the pump's current waveform on a digital storage oscilloscope (DSO). The scope pattern will reveal internal wear in the brushes and commutator that may not show up in a traditional pressure or volume test.
Observing the waveform will show if the pump's amp draw is normal for the application or is high or low, and if the pump is operating at normal speed or is running slow. Problems such as a bad spot on a commutator or a short or open in the armature also will be obvious in the waveform.

A "good" electric fuel pump waveform will generally seesaw back and forth with relative consistency and minimal variation between the highs and lows. A "bad" waveform will show large or irregular drops in the pattern, with large differences between the highs and lows.

Fuel Pump Replacement

What To Do if the Fuel Pump Checks Out Okay, but the Engine Still Won't Start

If the fuel pump is running and delivering normal pressure to the engine, and the engine has spark and compression, but will not start, the fuel injectors are probably not opening. The PCM uses the trigger signal from the crankshaft position sensor, and/or camshaft position sensor to pulse the injectors. The injectors should receive battery voltage when the key is turned on, and the PCM driver circuit provides the ground connection to energize the injectors.

The first check would be to check for voltage at the injectors when the key is turned on. No voltage? The problem could be a blown injector circuit fuse, a bad fuel injector power relay, or a fault in the wiring harness to the injectors. The injector fuse and relay are usually located in the relay box or power distribution center in the engine compartment.
If the fuse is okay, try swapping the relay with another to see if that gets voltage to the injectors so the engine will start. No change? Then the PCM may not be pulsing the injectors, or there may be a shorted injector that is robbing power from the circuit preventing the other injectors from opening.

TIP: Try unplugging the injectors one at a time and cranking the engine to see if it will start. If the engine starts when a particular injector has been unplugged, that's the shorted injector that needs to be replaced.
TIP: You can also measure the resistance of each injector with an ohmmeter. Unplug the injector and measure the resistance between the two terminals. If resistance is outside specifications (high or low), replace the injector.

Professional technicians use a tool called a NOID light to check injector pulses. The tool detects digital signals in a circuit and flashes an LED light. No flashes from the injector circuit when cranking the engine would tell you the PCM is not pulsing the injectors. On newer gasoline direct injection (GDI) systems, however, a NOID light is no help.
If the injectors appear to be working, but the engine is still not starting, the engine may be flooded with TOO MUCH fuel (remove a spark plug to see if it is wet). Let the engine sit awhile, then try again, or hold the gas pedal all the way down when cranking to put the PCM into the "Clear Flood" mode when starting the engine.

NOTE: Hard starting problems are sometimes the result of an improper starting technique on the part of the driver. On a fuel injected engine, DO NOT push or pump the gas pedal when trying to start the engine. This just puts the engine into the Clear Flood mode, which will cut off fuel to the engine temporarily making it even harder to start. Just crank the engine without touching the gas pedal.